These steps will guide users through connecting to the eduroam WiFi network on a Windows 7 device.
Requirements
eduroam credentials - in Colgate’s case, an active network account (the same account used to access the portal)
Windows 7 computer with wireless capability
Procedure
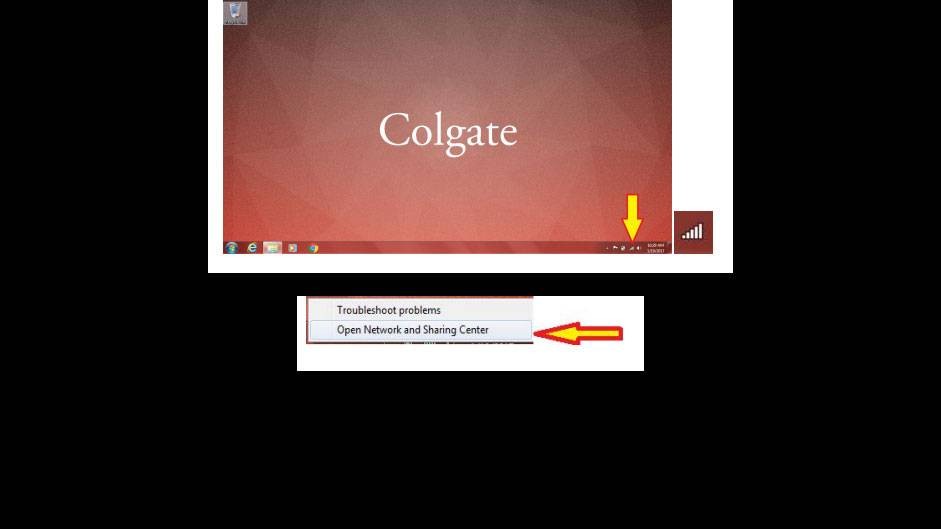
Step 1
Right click the WiFi icon at the bottom right of your desktop and select Open Network and Sharing Center.
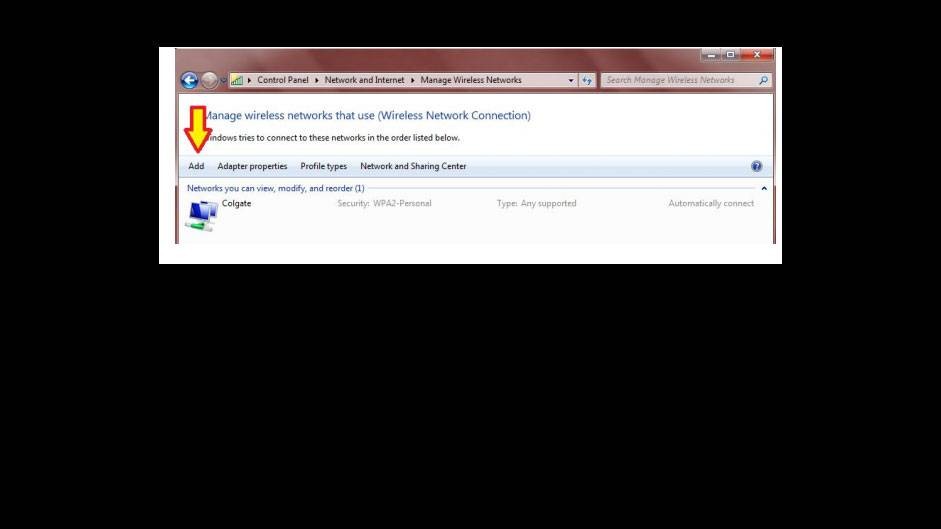
Step 2
Click Manage Wireless Networks at the top left of the Network and Sharing Center window.
Step 3
Click Add in the Manage Wireless Networks window.
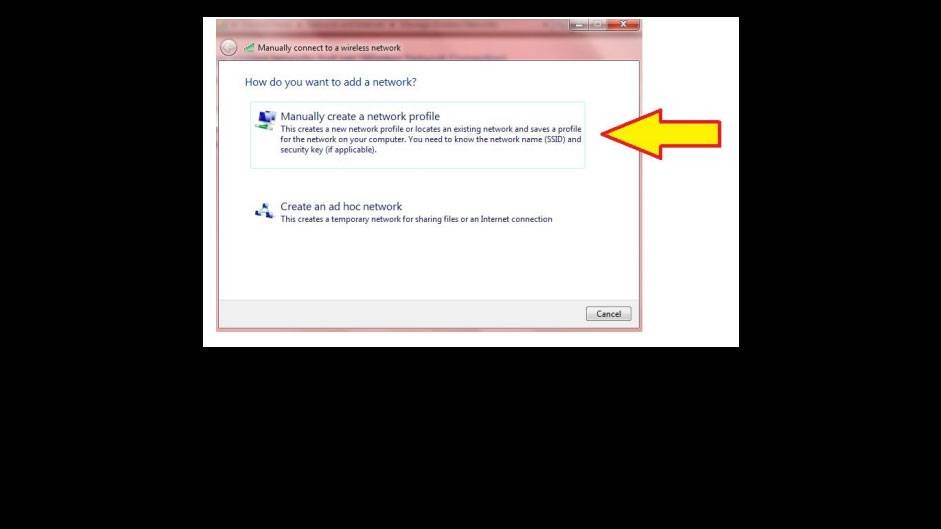
Step 4
Click Manually create a network profile.
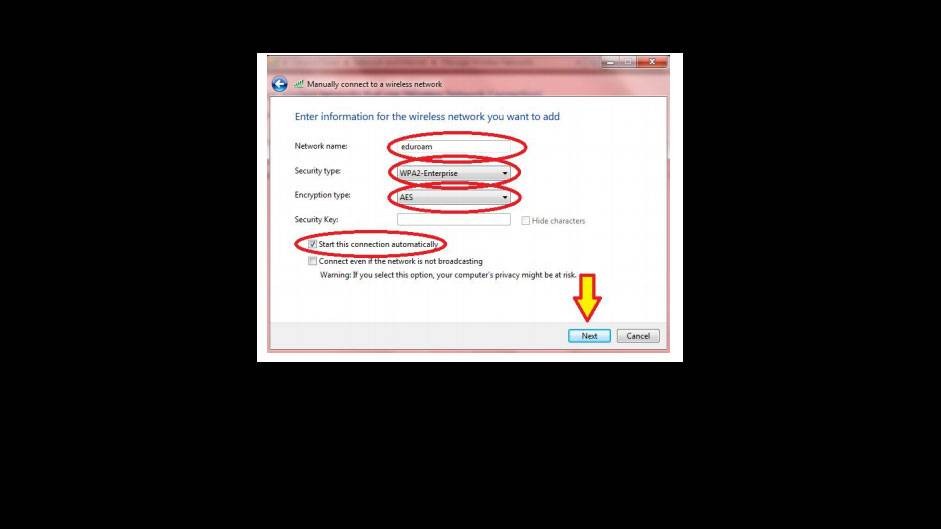
Step 5
Enter network name eduroam, security type WPA2-Enterprise, encryption type AES, and check the box to Start this connection automatically. Click Next.
Step 6
Click Change connection settings
Step 7
On the Security tab, click Settings.
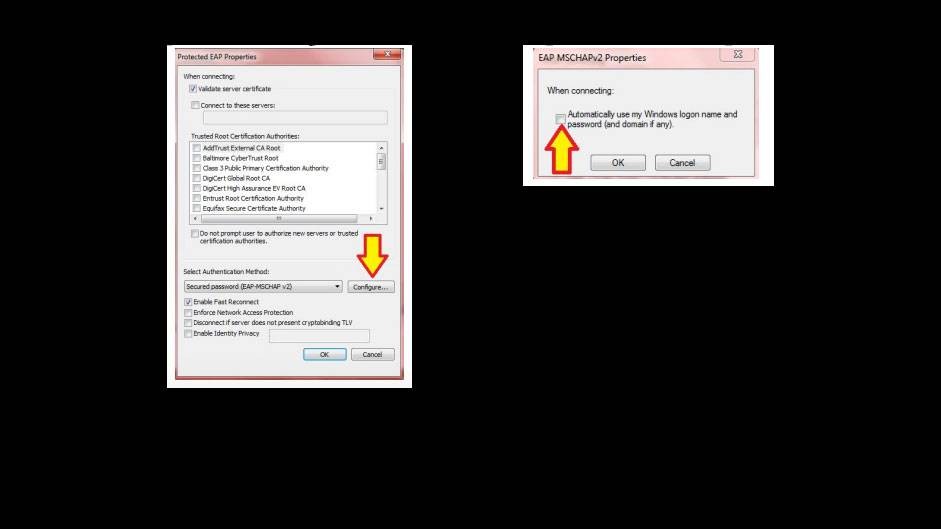
Step 8
In the Settings window, click Configure, uncheck the box to Automatically use Windows logon name and password, then click OK.
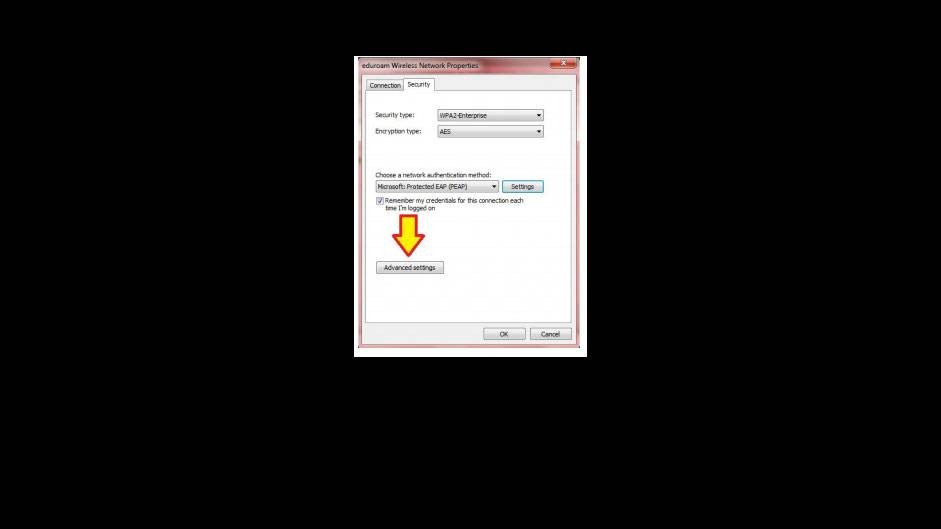
Step 9
Click OK until you are on the Security tab again, then click Advanced settings.
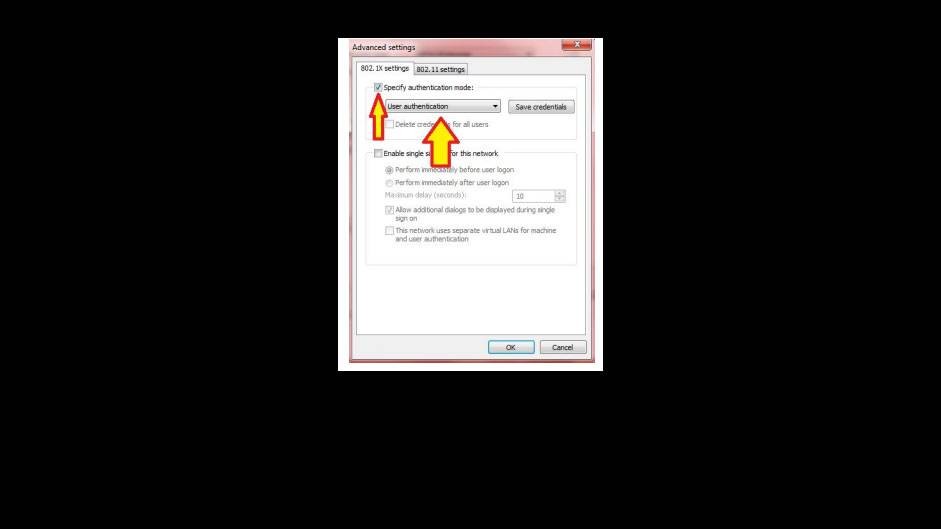
Step 10
Check the Specify authentication mode box, then select User authentication from the drop-down menu. Click OK until all windows are closed.
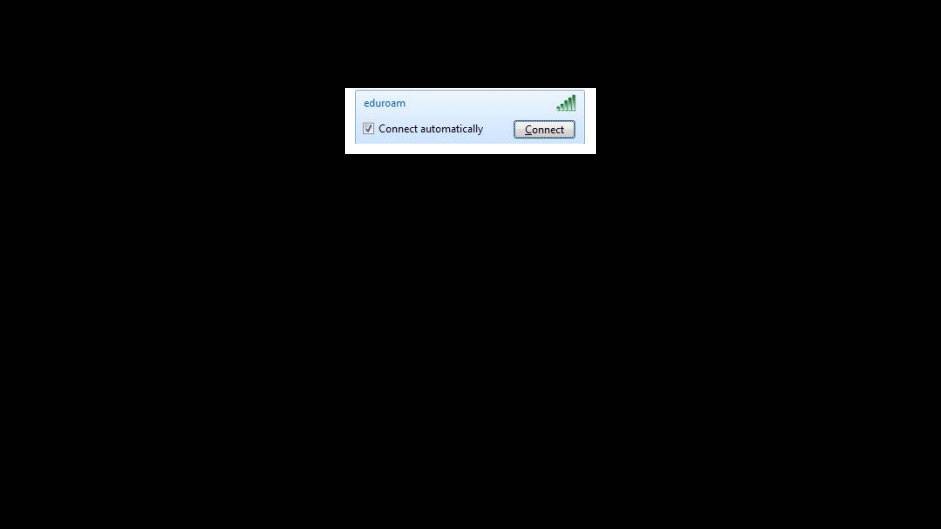
Step 11
Click the WiFi symbol at the bottom right of the screen, click the eduroam network in the list, and then click Connect.
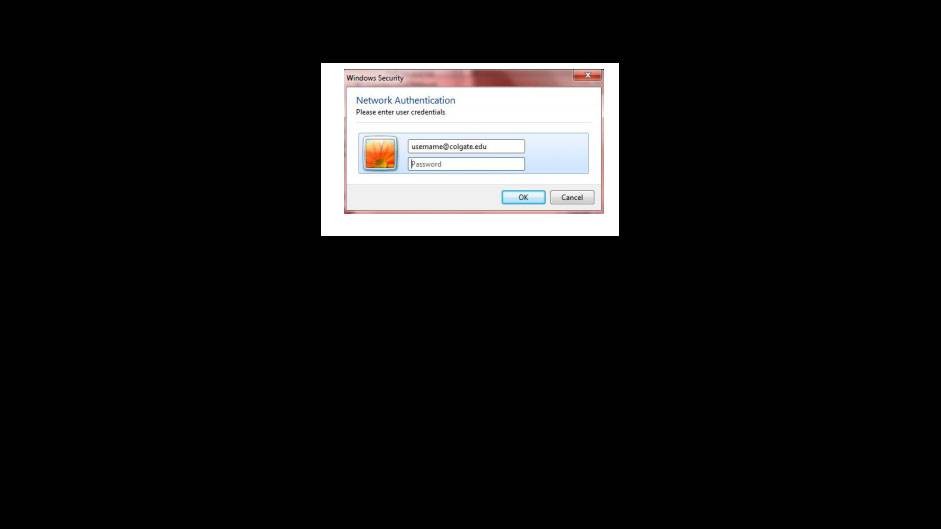
Step 12
When prompted, input your network email address (including @colgate.edu) and password. This is the same password you use to access the portal.
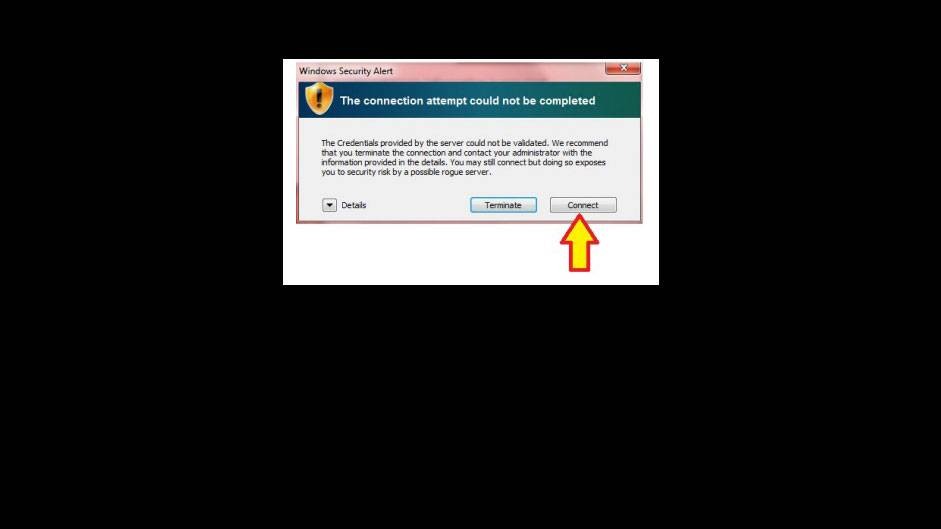
Step 13
You may receive an alert advising to terminate the connection. Instead, click the Connect button. After this step, you should be connected to the network.
eduroam (education roaming) is the secure, world-wide roaming access service developed for the international research and education community. It is the primary Wi-Fi network for the Colgate community. Devices registered on Colgate’s eduroam network will automatically connect to the eduroam network at other institutions worldwide. For more information, visit: www.eduroam.org
Ask for Help
If you are unable to find the information you need in the documentation available online, the ITS Service Desk is available to assist.