The Office of the Registrar's home page provides a host of registrar-related information, including the academic calendar and final exam information. Below you will find helpful faculty-specific content for key registrar functions. Contact the registrar's office (315-228-7408 or registrar@colgate.edu) if you have questions that are not covered here.
Electronic permission forms are hosted through OnBase. These forms help facilitate registrar-related permission/approval processes between students and faculty and replaces paper forms that required faculty signatures.
Please note that these online forms are not intended to replace the usual advising process that faculty signatures were designed to facilitate. Students are still encouraged to have conversations with faculty prior to submitting the forms, though it's reasonable to expect that some of the conversations may now take place after the form is submitted and before you take action.
Students are expected to reach out to the department and/or view the transfer credit policies PRIOR to submitting a course equivalency request form. If you receive a request form from a student you haven’t previously spoken to, feel free to reach out to them prior to acting on their request.
You will receive a notification email when a major or minor declaration form has been submitted that requires your attention. The email will contain a link to access the form so you can take action.
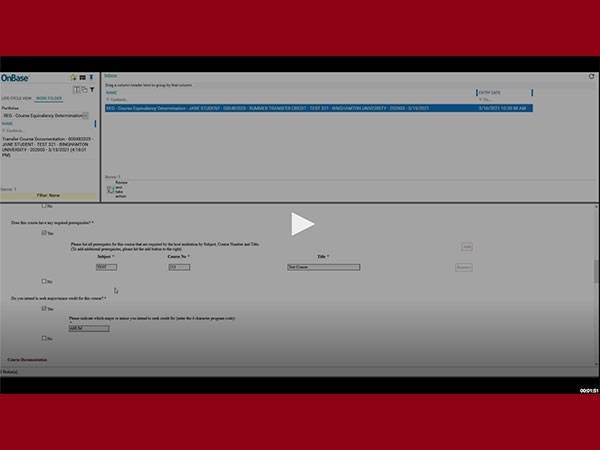
Instructions for Transfer Credit Evaluators:
- Click the link in the email notification. (Please use a non-mobile device to avoid issues.)
- If prompted, log in using your Colgate credentials.
- If you have more than one item, you can select the one you want to review by clicking on it in the top pane.
- You may need to adjust your screen to better view the bottom pane containing transfer course information for the student. To do this, hover over the horizontal line splitting the panes and drag your cursor up to expand the lower pane.
- The course syllabus is in the upper left hand corner. You should select your viewing method, and double click the document.
- After you've reviewed the information and had any relevant discussions with the student, you can take action by clicking the "Review and take action" button, located just above the mid divider bar. This will open your action options in the top pane. Again, you can drag the divider bars to adjust your view.
- If you decide you are not ready to take action, you can click the Discard and Cancel button on the right.
- If you are ready to act, select the appropriate check box to indicate your decision.
- If you deny, you may leave a comment for the student and click Submit. This will end the workflow and no further action will be available on the request. The student will be notified of your decision and will be instructed to contact you with any questions.
- If you approve or provisionally approve, you will be prompted to fill out the appropriate course equivalency.
- If you select provisional approval, the student will be required to submit additional documents after completing the course.
- You may leave any notes to the student or the registrar’s office, as needed. The registrar’s office will see all notes. Students will only see the notes written to them.
- Click the “Submit” button to send the approved course to the registrar’s office for final processing.
What happens next:
- You will receive a confirmation email with your decision indicated.
- You can also view the status of the form by clicking the link in the confirmation email.
- If you approved, the registrar's office will be notified they have a form to review.
- If the chair approves, the registrar’s office will be notified and will process the form as soon as possible.
- Once processed, the student will receive an email notification.
- If, for any reason, the registrar’s office is unable to process the course equivalency request form, the student, will be notified.
Contact the registrar's office (transfercredit@colgate.edu or 315-228-7408) if you have any questions or need additional help.
OnBase Navigation:
We have tried to optimize the email notifications to make it easier for you to act on each request. However, you can also log into OnBase directly to view all of your outstanding items.
- After logging in, click on the menu icon (≡) on the top left and choose "Open Workflow." This will bring up a new window displaying all of the workflows you have access to.
- Click the arrow (>) to the left of each workflow to expand the selection.
- If you have an outstanding item, the relevant workflow will be bold and show a count of remaining items.
- Click the name of the workflow to display the contents.
- Click a form to view the information and make a decision.
Students who cannot register for a course online due to one or more restrictions are expected to complete the Course Restriction Override Request form (available on the Registration Information or the Drop/Add web pages). The instructor will receive an email notification if a student submits a request.
Approve/Deny Instructions:
- Click the link in the email notification. (Please use a non-mobile device to avoid issues.)
- If prompted, log in using your Colgate credentials.
- If you have more than one item, you can select the one you want to review by clicking on it in the top pane.
- You may need to adjust your screen to better view the bottom pane containing the submission information for the student. To do this, hover over the horizontal line splitting the panes and drag your cursor up to expand the lower pane.
- After you've reviewed the information in the bottom pane, you can take action by clicking the "Review and take action" button, located just above the mid divider bar. This will open your action options in the top pane. Again, you can drag the divider bars to adjust your view.
- If you decide you are not ready to take action, you can click the Discard and Cancel button on the right.
- If you are ready to act, select the appropriate check box to indicate your decision.
- If you deny, the student will be notified and will not be eligible to register. Click Submit to finalize your decision.
- If you approve, you'll be prompted to specify what type of approval you are giving:
- Override only requested restrictions
- Use this approval to give the student permission to register based on the reasons they selected. If there are additional restrictions not indicated, the student may not be eligible to register without additional approval.
- Override all restrictions except max enrollment limits
- Use this approval to give the student permission to register despite any and all restrictions, except for max enrollment. The student will only be eligible to register if a seat is available.
- Override all restrictions, including max enrollment limits
- Use this approval to give the student permission to register for any and all restrictions and permit them to over enroll the course if a seat is not available. (Note: giving a student permission to over enroll the course does not adjust the max cap, it lets the student register despite the max cap. If the course is over enrolled and a student drops, no other student will be able to over enroll without permission.)
- Override only requested restrictions
- Click Submit to finalize your decision.
What happens next:
If you approved, coding will be added to the student's record according to the approval given. Once the coding is added, the student will be notified by email and instructed to register themselves online. Once they are registered you will see them on your portal roster.
If you have any questions or concerns, please contact the registrar's office (registrar@colgate.edu).
The grade change form is available in the class roster in the portal.
- Log into the portal.
- Navigate to the regular class roster in Faculty Dashboard (not the Submit Grades roster).
- Each student has a unique Grade Change icon located in the far right column, just after their email address. You may have to scroll over to view it.
- After you click the icon, you will be taken to the appropriate grade change form, based on the student's recorded grade.
Incomplete/NG Grade Submission:
The grade change form is used to submit the final grade for a student who was issued an incomplete.
- Access the grade change form as described above.
- Select the final grade from the drop down menu.
- Click submit.
What happens next:
No other permissions are required so the registrar's office will be alerted to your submission and will update the student's grade accordingly. The student will be notified when the change has been processed by the registrar's office.
Formal Grade Change Requests:
Grade changes are instructor initiated and must be approved by the appropriate chair/director and the Dean for Academic and Curricular Affairs.
Instructions for Instructors:
- Access the grade change form as described above.
- Select the new grade from the drop down menu.
- Enter an explanation/rationale for the grade change (you can also attach a document, if needed).
- Select the relevant chair/director from the drop down list.
- Click Submit.
What happens next:
The chair/director will receive an email and be prompted to take action on your request. If denied, you'll be notified by email. If approved, it will be sent to the Associate Dean of the Faculty for Curricular and Academic Affairs for final approval. You will receive an email when the dean takes action. If it's approved, the registrar's office will be notified. Once the grade is changed, the student will receive an email notification.
NOTE: There are some instances when you will not be permitted to submit a grade change request. If the student is not eligible for a grade change, you will be directed to a page explaining why you cannot access the form. Possible reasons include: the grade hasn't been rolled yet and is still available on the Submit Grades roster and/or the student has a status (e.g., withdrawn) that prevents changes to their academic record.
Instructions for Chairs/Directors:
When an instructor submits a grade change, they choose which chair/director to send it to. If you think you received a request in error, you can deny it and provide that explanation in the notes box. The instructor will see the information in the email they receive. They can submit again choosing the appropriate chair.
- Click the link in the email notification. (Please use a non-mobile device to avoid issues.)
- If prompted, log in using your Colgate credentials.
- If you have more than one item, you can select the one you want to review by clicking on it in the top pane.
- You may need to adjust your screen to better view the bottom pane containing the grade change information. To do this, hover over the horizontal line splitting the panes and drag your cursor up to expand the lower pane.
- When you are ready, you can take action by clicking the Review and Take Action button, located just above the mid divider bar. This will open the action form in the top pane.
- Choose your action (approve or deny) and click Submit. You can also write notes that will be visible to the instructor, Dean of Academic and Curricular Affairs, and the registrar's office, if needed.
What happens next:
- You and the instructor will receive a confirmation email with your decision indicated and, if approved, the form will be sent to the Dean of Academic and Curricular Affairs for final approval.
- If the dean denies, the chair and instructor are notified.
- If the dean approves, the instructor, chair, and registrar's office are notified.
- Once the registrar's office processes the grade change, the student will be notified.
Students initiate the independent study application process. They are expected to reach out to the instructor they hope to serve as their faculty adviser prior to submitting the form, to discuss the topic, methodology, and the means of evaluation. They can navigate to the independent study form from the registrar’s website, under Forms. The deadline for submitting an independent study form is the last day of drop/add.
The student will enter the term and subject and will indicate if this is an honors course. They will indicate the course credits (1.00 or .50) and the course length (full term, first half-of-term or second half-of-term). They will then enter a title. Course-specific titles for independent studies can be up to 24 characters long, e.g., GEOL 491 AL - Indp: Antarctic Paleoclimate. They will select the faculty adviser from a dropdown list. Finally, the student will enter or upload a course description.
You will receive a notification email when an independent study form has been submitted that requires your attention. See below for processing instructions.
Please keep in mind that while independent study courses are not offered to students free of charge, faculty advisers do not receive additional compensation for supervising an independent study. You can find more information on the Independent Study Guidelines webpage or by reaching out to the Office of the Registrar at registrar@colgate.edu or 315-228-7408.
Instructions for Faculty supervisors:
- Click the link in the email notification. (Please use a non-mobile device to avoid issues.)
- If prompted, log in using your Colgate credentials.
- If you have more than one item, you can select the one you want to review by clicking on it in the top pane.
- You may need to adjust your screen to better view the bottom pane containing information from the student. To do this, hover over the horizontal line splitting the panes and drag your cursor up to expand the lower pane.
- Begin by clicking the "Review and take action" button, located just above the mid divider bar. This will open your action options in the top pane. Again, you can drag the divider bars to adjust your view.
- If you decide you are not ready to take action, you can click the Discard and Cancel button on the right.
- In the top pane, select the appropriate check box to indicate your decision.
- If you deny, you may leave a comment for the student and click Submit. This will end the workflow and no further action will be available on the request. The student will be notified of your decision and will be instructed to contact you with any questions.
- If you approve, you will be prompted to enter the course number.
- Level typically corresponds to the student’s class year (e.g., juniors 391, seniors 491).
- Use “Other” when it’s a Z course (independent version of a regularly-offered course), or if it’s honors and your department has a designated number.
- Indicate if the course should be coded for honors.
- You can adjust/correct the subject code, credits, and term length entered by the student, if needed.
- The chair/director information is preselected based on subject code.
- If you need to change the person indicated, click the box below chair name and select the appropriate person from the list.
- You may leave any notes to the student or the registrar’s office, as needed. The chair/director and the registrar’s office will see all notes. Students will only see the notes written to them.
- Click the “Save and Submit” button to send it to the chair/director.
What happens next:
- You will receive a confirmation email with your decision indicated.
- You can also view the status of the form by clicking the link in the confirmation email.
- If you approved, the chair or director you indicated will be notified they have a form to review.
- If the chair approves, the registrar’s office will be notified and will process the form as soon as possible.
- If the chair denies the application, you and the student will receive an email notification. The student will be instructed to reach out to you with any questions.
- Once processed, the student will receive an email notification prompting them to register for the course.
- If, for any reason, the registrar’s office is unable to process the application, you, the student, and the chair will be notified.
Contact the registrar's office (registrar@colgate.edu or 315-228-7408) if you have any questions or need additional help.
Instructions for Chairs/Directors:
Instructions for the chair/director follow very closely to the faculty supervisor instructions listed above.
- Select “This Independent Study is Approved” check box to review the information submitted by the student and faculty supervisor. You may make any adjustments/corrections as needed.
- If you approve, click submit to officially approve the application.
- If you deny, you can change your response by clicking the check box that says “This Independent Study is denied.”
- If needed, add comments to the student or the registrar's office before submitting. The registrar's office will see all notes, the student will only see notes to them.
What happens next:
- You will receive a confirmation email indicating your decision. You can also view the status of the form by clicking the link in the confirmation email.
- If you approved, the registrar’s office will be notified and will process the form accordingly.
- Once processed, the student will be prompted to register themselves.
- If, for any reason, the registrar’s office is unable to process the application, you, the student, and the adviser will be notified.
Students are expected to reach out to the faculty member they hope to have serve as their adviser PRIOR to submitting a declaration form. If you receive a declaration form from a student you haven’t previously spoken to, feel free to reach out to them prior to acting on their request.
You will receive a notification email when a major or minor declaration form has been submitted that requires your attention. The email will contain a link to access the form so you can take action.
View our video tutorial or review the instructions below for acting on major/minor requests.
Instructions for Advisers:
- Click the link in the email notification. (Please use a non-mobile device to avoid issues.)
- If prompted, log in using your Colgate credentials.
- If you have more than one item, you can select the one you want to review by clicking on it in the top pane.
- You may need to adjust your screen to better view the bottom pane containing declaration information for the student. To do this, hover over the horizontal line splitting the panes and drag your cursor up to expand the lower pane.
- After you've reviewed the information and had any relevant discussions with the student, you can take action by clicking the "Review and take action" button, located just above the mid divider bar. This will open your action options in the top pane. Again, you can drag the divider bars to adjust your view.
- If you decide you are not ready to take action, you can click the Discard and Cancel button on the right.
- If you are ready to act, select the appropriate check box to indicate your decision.
- If you deny, you may leave a comment for the student and click Submit. This will end the workflow and no further action will be available on the request. The student will be notified of your decision and will be instructed to contact you with any questions.
- If you approve, you will be prompted to select the appropriate chair or director to have the request forwarded for final approval.
- You may leave any notes to the student or the registrar’s office, as needed. The chair/director and the registrar’s office will see all notes. Students will only see the notes written to them.
- Click the “Send to Chair/Director for Approval” button to submit.
What happens next: - You will receive a confirmation email with your decision indicated.
- You can also view the status of the form by clicking the link in the confirmation email.
- If you approved, the chair or director you indicated will be notified they have a form to review.
- If the chair approves, the registrar’s office will be notified and will process the form as soon as possible.
- If the chair denies the declaration, you and the student will receive an email notification. The student will be instructed to reach out to you with any questions.
- Once processed, you will see the student on your advisee list in Adviser’s Dashboard in the portal and the student will receive an email notification.
- If, for any reason, the registrar’s office is unable to process the declaration, you, the student, and the chair will be notified.
Contact the registrar's office (registrar@colgate.edu or 315-228-7408) if you have any questions or need additional help.
- If, for any reason, the registrar’s office is unable to process the declaration, you, the student, and the chair will be notified.
Instructions for Chairs/Directors:
- View the Chair video tutorial for visual instructions. Written instructions for the chair/director follow very closely to the adviser instructions listed above, the only difference being that they don't have to choose a person to send it to. Select the appropriate decision check box and click submit.
- If needed, add comments to the student or the registrar's office before submitting. The registrar's office will see all notes, the student will only see notes to them.
What happens next:
- You will receive a confirmation email indicating your decision. You can also view the status of the form by clicking the link in the confirmation email.
- If you approved, the registrar’s office will be notified and will process the form accordingly.
- Once processed, the student will appear on the adviser’s list in Adviser Dashboard in the portal and the student will receive an email notification.
- If, for any reason, the registrar’s office is unable to process the declaration, you, the student, and the adviser will be notified.
OnBase Navigation:
We have tried to optimize the email notifications to make it easier for you to act on each request. However, you can also log into OnBase directly to view all of your outstanding items.
- After logging in, click on the menu icon (≡) on the top left and choose "Open Workflow." This will bring up a new window displaying all of the workflows you have access to.
- Click the arrow (>) to the left of each workflow to expand the selection.
- If you have an outstanding item, the relevant workflow will be bold and show a count of remaining items.
- Click the name of the workflow to display the contents.
- Click a form to view the information and make a decision.
If the link in the email notification is not bringing you to the appropriate form, please try one or more of these options to access it:
- Use an incognito/private window.
- Right click on the link in the email and copy the link address.
- Paste the url into an incognito/private window.
- This typically resolves most issues and allows you to take action on the request.
- Clear your cookies and/or cache.
- The instructions vary by browser, but generally you can clear your cookies and cache by accessing the Settings page in your browser.
- If you are clearing your cache/browser history, you should clear back to before you last successfully accessed an OnBase form.
- Navigate to OnBase directly.
- After logging in, click on the menu icon (≡) on the top left and choose "Open Workflow." This will bring up a new window displaying all of the workflows you have access to.
- Click the arrow (>) to the left of the relevant workflow to expand the selection.
- If you have an outstanding item, the relevant workflow will be bold and show a count of remaining items.
- Click the name of the workflow to display the contents.
- Click a form in the top pane to view the information and take action.